| Restocking Fee | No |
|---|---|
| Return shipping will be paid by | Seller |
| All returns accepted | Returns Accepted |
| Item must be returned within | 30 Days |
| Refund will be given as | Money back or replacement (buyer's choice) |
| MPN | Does Not Apply |
| Brand | USSR |
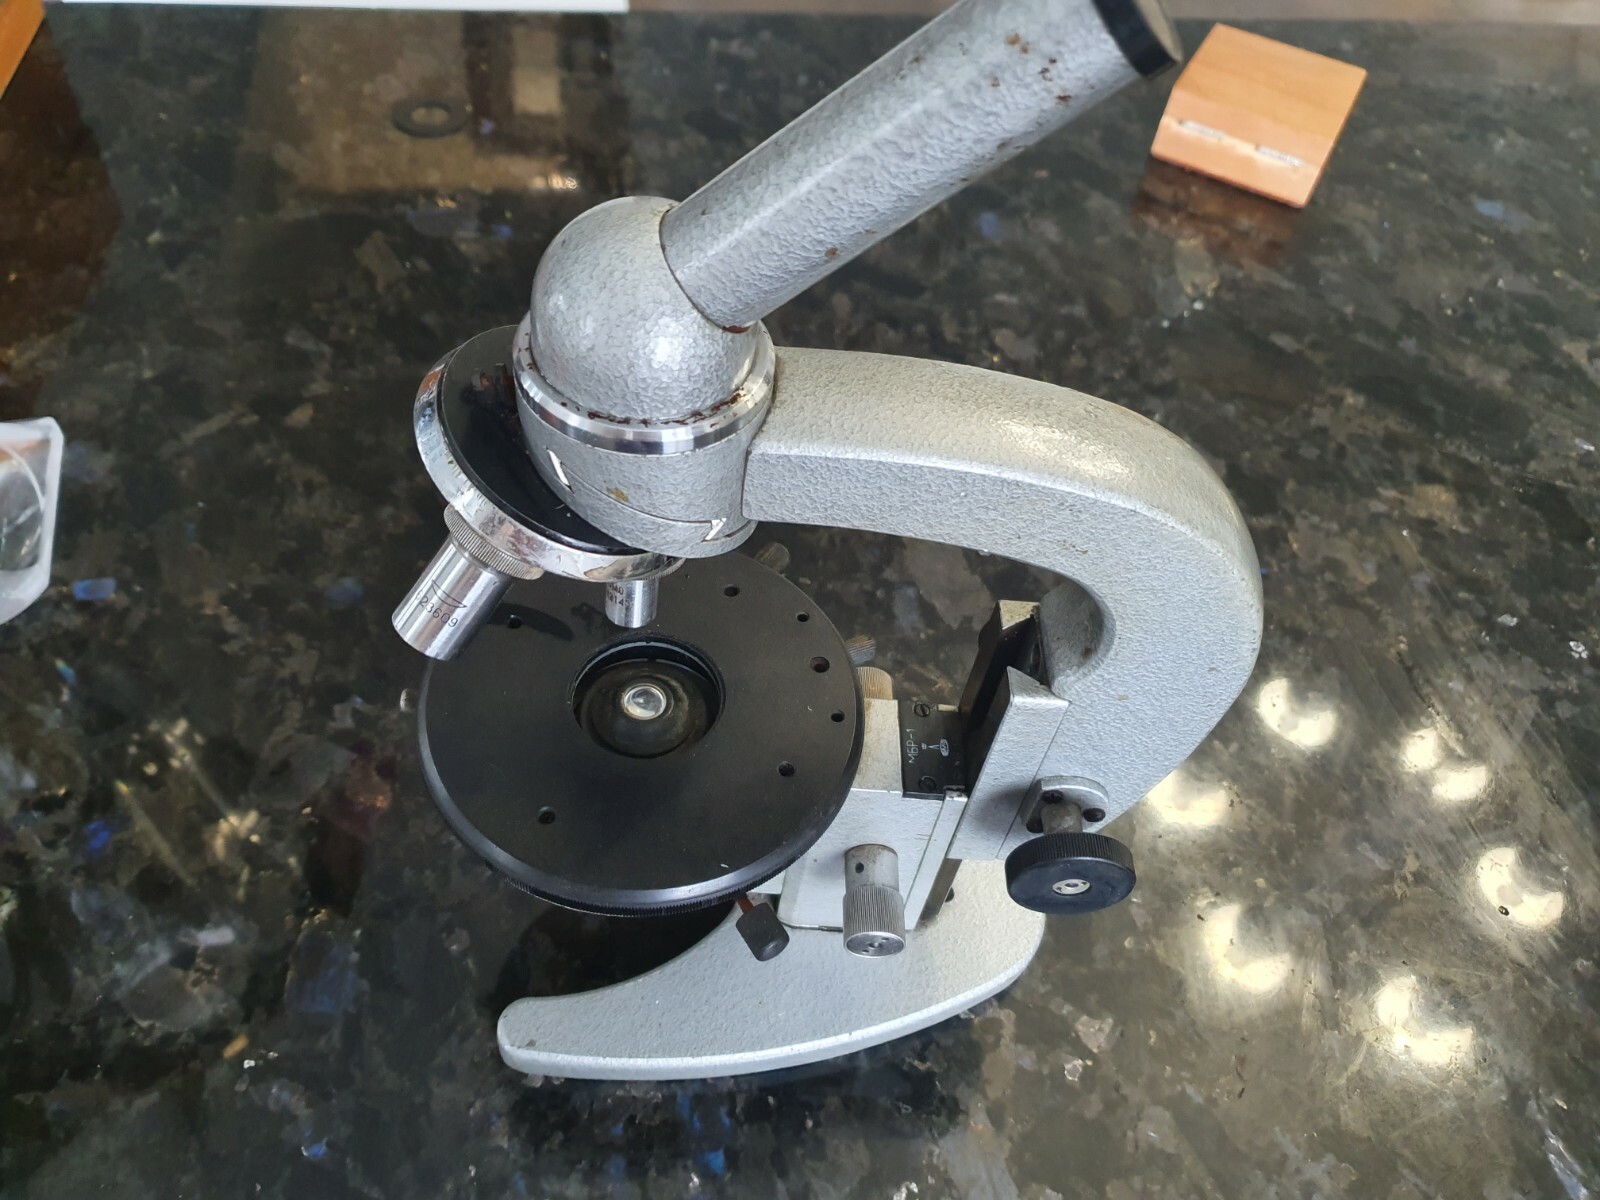
Check the listing for details. Microscope MBR-1 Made in USSR TOP quality. Condition: Used. Listed at 199.99 USD. 100% Original NEW USSR! Biological working microscopes MBR-1 and MBR-1A are intended for research of transparent preparations in passing light in a light field and are used in medical, biological, bacteriological and other laboratories. Microscopes MBR-1 and MBR-1A are identical in design and differ only in configuration. On microscopes, you can photograph preparations using microphotonasadok MFN-7, MFN-8, MFN-9, MFN-12, use binocular attachments AU-12 and AU-29, dark field condenser OI-13, phase contrast device KF-4 and other accessories (not included in the set of microscopes). II. BASIC DATAMagnification: MBR1 -- 56-1350x; MBR-1A -- 63 - 1350x.The aperture of the condenser is 0.3-1.2.Lenses: 8x0, 20; 9x0, 20; 40x0, 65; 40x0, 75 VI; 90x1, 25 MI.Eyepieces: Huygens 7x, 10x, 15x, Compensation 15x.Weight: MBR-1-3.35 kg; MBR-1A-3.45. III. OPTICAL SCHEMEThe optical scheme of the microscope is divided into two systems: lighting, which includes a mirror 1 (Fig. 1), a condenser 2 with an iris aperture 3 and a removable light filter 4, and observation, consisting of a lens 5, prism 6 and eyepiece 7, connected in the tube of the microsA beam of rays from a natural or artificial light source falls on the mirror 1, which reflects it to the aperture diaphragm 3, passes through the condenser 2 and the test preparation and enters the lens 5. The image of the aperture aperture is obtained in the output pupil of the lens, so that the field of view of the microscope is illuminated most evenly. The lens gives an image of the drug in the plane of the field diaphragm of the eyepiece 7, which serves for viewing an enlarged image of the drug. Prism 6 deflects the beam 45° from the vertical. The inclined position of the output beam makes it convenient to work with the microscope. Dotted lines in the drawing show the rays that give an image of the Central point of the drug, solid lines— the rays that pass through the edges of the field of view of the microscope.WORKING PROCEDUREThe quality of the image in the microscope depends largely on the lighting, so setting up the lighting is an important preparatory operation. The drug can be illuminated with both artificial and natural light. When responsible work should use artificial lighting, for which it is recommended to use the illuminator OI-19 (not included in the kit of the microscope). 1. Configuration to work with artificial lighting The illuminator OI-19 and the microscope must be connected with a bar that provides a normal distance from the illuminator to the microscope. On the two spikes of one end of the connecting bar, you should put a microscope tripod, on the other end of the bar— an illuminator. In this case, the bar spikes should enter the holes at the bottom of the base of the microscope, and the illuminator spike - into the hole of the bar. The illuminator lamp is connected to the network via a step-down transformer. The transformer is produced with the installation of a lever on 220V. If it is necessary to switch it to 127V, move the lever through the window at the bottom of the transformer and set it to the number "127". Note. On special request, transformers can be supplied with other input voltage. In this case, the lever is set to the voltage corresponding to the voltage of the consumer's network. To adjust the lamp's glow, the transformer housing has a rheostat with a handle, and a switch for turning on the current. After connecting the illuminator lamp to the transformer and the transformer to the network, you can start setting up the lighting. First, you should raise the condenser to the stop by rotating the handle 22 and close the iris aperture of the illuminator, which is the field diaphragm of the microscope, to the limit. The mirror of the microscope should be turned with a flat surface towards the illuminator and set it at an approximate angle of 45° to the axis of the condenser. Turn the illuminator relative to the vertical and horizontal axes to direct the light to the center of the mirror and turn the handle 23 to close the iris diaphragm of the condenser, which is the aperture diaphragm of the microscope. By moving the lamp holder along the axis, you need to achieve the sharpest image of the threads on the surface of the petals of the closed iris diaphragm of the condenser. This image should be clearly visible if you look at the microscope mirror from the side of the illuminator. In the revolver of the microscope, you should screw the necessary lenses, placing them in order of increasing magnification (from a weak lens to a stronger one) clockwise, if you look at the microscope tripod from above when it is in its working position. Working with an 8x0,20 or 9x0,20 lens.The 8x0,20 and 9x0,20 lenses have the largest field of view; they are mainly used as a finder for preliminary examination of the drug and the selection of sites for more detailed research. If you intend to use the 8x0,20 or 9x0,20 lens for a long time for work that requires small magnification (for example, when studying plankton), or when photographing, it is recommended to remove the upper lens of the condenser from the lighting system. To do this, release the locking screw 24, remove the condenser from the bracket sleeve and Unscrew the upper front lens, then re-install the condenser in the sleeve and secure with the screw. When the front lens is removed, the image of the field aperture of the illuminator covers the entire field of view of the microscope in excess. If the 8x0,20 or 9x0,20 lens is used as a finder, the upper lens of the condenser should not be removed, since it is not possible to use stronger lenses without it. Further lighting settings should be made as follows. Place the preparation on the Central part of the microscope table and press it with the terminals. In the course of the rays, include an 8x0,20 or 9x0,20 lens. Install a 7x eyepiece in the microscope tube. Open the field and aperture diaphragms. Rotate the handles 17 to focus the microscope on the drug. Close the field and aperture diaphragms. Observing in a microscope, slowly lower the condenser until the image of the field aperture of the illuminator appears in the field of view. Swing the mirror 1 (Fig. 1) to set the image of the field diaphragm in the center of the field of view and open it completely. If the front lens of the condenser is not removed, the image of the field diaphragm will be smaller than the field of view of the microscope, so you need to lower the condenser to a position where the field of view will be fully illuminated, or install a frosted glass in the folding frame of the condenser. After that, you can start studying the drug. With each lens included in the kit, you can use any of the eyepieces. However, at the beginning of observations, it is recommended to use the weakest 7x eyepiece. When observing with an 8x0,20 or 9x0,20 lens, it is more convenient to move the drug on the surface of the slide table with your hand. There are two centering screws 15 (Fig. 2) for precise installation of the preparation on the slide table. As indicated, the top disk of the table can be rotated 360°. The table is fixed in any position with a locking screw 14. Working with a 40x0,65 lens.After selecting the area of the drug intended for more detailed study, it is necessary to set it in the center of the field of view using the centering screws of the object table. If this is not done carefully enough, the area may not fall into the field of view of a stronger lens. Next, turn the revolver and include the lens 40x0, 65 in the course of the rays. Then you need to correct the focus of the microscope for image sharpness. Since all the lenses are aligned with each other, it is enough to turn the handle 13 micrometer focus slightly to correct the focus. Raising the condenser until it stops, close the field diaphragm of the illuminator and the eyepiece to bring the image of the field diaphragm in the center of the field of view of the microscope by a small tilt of the mirror 1 (Fig. 1). The field diaphragm should be opened so that the diameter of its image is equal to the diameter of the field of view of the microscope, then set the most favorable opening size of the aperture diaphragm 3. The image of the aperture diaphragm in the exit pupil of the microscope objective (close to the last lens element) can be seen if you remove the eyepiece tube from the microscope and look in the tube on the last lens of the lens. First, the aperture aperture should be closed to the limit, then, observing in the output pupil of the lens, gradually open the aperture aperture until its image covers the entire opening of the output pupil. It is usually recommended to set the size of the aperture aperture, at which the diameter of its image is equal to 2/3 of the diameter of the output pupil of the microscope lens. However, the final opening of the aperture diaphragm depends on the type of drug. The diaphragm opens so that the image of the drug is the most contrasting. When the aperture is too open, the image contrast is usually reduced. You can not adjust the brightness of the image by narrowing the aperture or lowering the condenser, since this reduces the resolution of the microscope. To reduce the brightness of the image, a daylight filter is installed in the folding frame under the condenser, or the lamp's glow is reduced using the transformer's rheostat. The 40x0. 65 lens gives a contrasting and sharp image only with a 0.17 mm thick cover glass. The image quality deteriorates if the thickness of the cover glass differs from the specified one by ±0.02 mm (measured using a screw micrometer). Working with a 40x0,75 lens.If you need to use a water immersion lens to study the drug, then after selecting a section of the drug and bringing it to the center of the field of view with a 9x0,20 lens, you need to include a 40x0,75 lens in the course of the rays. After that, you need to correct the focus of the microscope and bring the selected area of the drug back to the center of the field of view. When working with a water immersion lens, keep in mind that this lens is very sensitive to changes in the thickness of the cover glass, since the refractive index of water differs from the refractive index of the cover glass. The best image quality when working with this lens is obtained with a cover glass 0.17 mm thick. Before working,apply a drop of distilled water to the front lens of the 40x0, 75 lens and to the preparation. When working with a 40x0,75 lens, the condenser must be raised to the stop. Do not allow the lens to come into contact with the drug, as this may cause them to break. The microscope is configured as follows.At the beginning of focusing, when the image of the object is not yet visible in the field of view, to increase the depth of field of the microscope, it is recommended to close the aperture diaphragm of the condenser almost completely. Then check the centricity of the image of the lamp thread in the plane of the aperture diaphragm of the condenser, as indicated above. After that, watching the side of the microscope tripod for the gap between the lens and the drug, rotating the handle of the rough focusing mechanism of the microscope, you need to very carefully lower the tube almost to the contact of the lens with the drug. In this case, a layer of liquid is formed between the front lens of the lens and the drug. Then, by turning the handle of the micrometer focusing with simultaneous observation through the eyepiece, should raise tube of the microscope until the sharp image of the object in view and to correct antichnosti and the sharpness of the image field diaphragm of the illuminator according to the instructions made lens 40x0,65. After that, you need to take out the eyepiece of the microscope and, observing the output pupil of the lens in the tube, set the necessary size of the aperture diaphragm of the condenser. At the end of the work, the distilled water from the lens and the drug must be removed with a clean cloth or cotton wool, screwed on a wooden stick or match. Working with a 90x1,25 (MI) lens. Note about Payment: PayPal Only; Note about Feedback:Please leave me feedback when you receive your item and are happy with the transaction. If you have any questions or concerns, PLEASE contact me first before leaving negative feedback. I always strive to resolve any problems and make our customers happy. Note About Delivery Time:I try to send your item as soon as possible, Normally no later than 3 days after payment is received. arrive time is contingent on the carrier.
You may also like